Last Updated on July 20, 2026 by Deliciously Organic Editor
If you’ve never made a homemade marshmallows recipe before, I promise it is much easier than it sounds! And the best part is that you can make marshmallows without corn syrup.
Most marshmallows recipes use corn syrup or refined sugars. I wanted a better option, so I created this marshmallow recipe using maple syrup instead. It still makes soft, fluffy marshmallows, but without the highly processed ingredients.
This is also a really fun recipe to make with kids. They love watching maple syrup, gelatin, and water turn into a big bowl of fluffy goodness.
As with all desserts, these marshmallows are best enjoyed in moderation. They are not a health food, but they are a much better version of a classic treat.
If you want to use these for homemade s’mores, be sure to check out my gluten-free graham cracker recipe.
Ingredients You Need and Why
Each ingredient in this marshmallow recipe has a purpose.
Unflavored grass fed gelatin gives marshmallows their structure and bounce.
Water allows the gelatin to bloom and dissolve properly.
Maple syrup replaces corn syrup and adds natural sweetness.
Vanilla extract adds flavor and warmth.
Celtic sea salt balances the sweetness and improves flavor.
Using maple syrup instead of corn syrup makes this recipe less processed and easier on the body.
How to Make Homemade Marshmallows
This marshmallow recipe comes together in just a few simple steps.
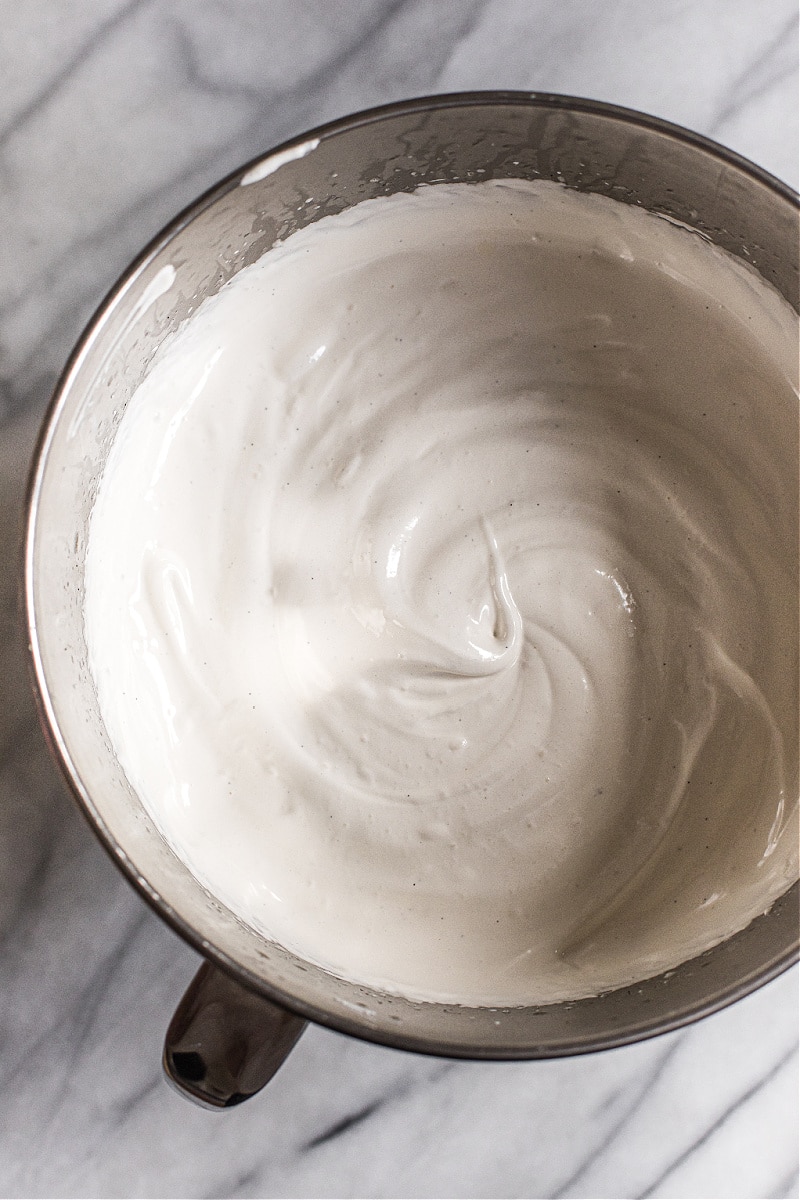
First, sprinkle the gelatin over water in the bowl of a standing mixer. Let it sit for about five minutes so it can soften.
Next, gently simmer the maple syrup, vanilla, and salt until it reaches 240º F. This step is important because it thickens the syrup so it behaves like corn syrup.
Slowly pour the hot syrup into the gelatin while the mixer is running. Then turn the mixer to high and whip until the mixture is thick, fluffy, and doubled in size.
Pour the mixture into an oiled baking dish and let it sit overnight at room temperature.
Step-by-Step Making Marshmallows
- Bloom the gelatin in water.
- Heat the maple syrup to 240 degrees.
- Slowly mix the syrup into the gelatin.
- Whip until fluffy.
- Pour into a dish and let set overnight.
That’s it! The process looks fancy, but it is very simple once you try it.
Do I Absolutely Need a Candy Thermometer?
A candy thermometer is very helpful for this marshmallow recipe.
Reaching 240ºF is key. If the syrup is too cool, the marshmallows will not set properly. If it gets too hot, they can become stiff.
If you plan to make marshmallows more than once, a candy thermometer is definitely worth having.
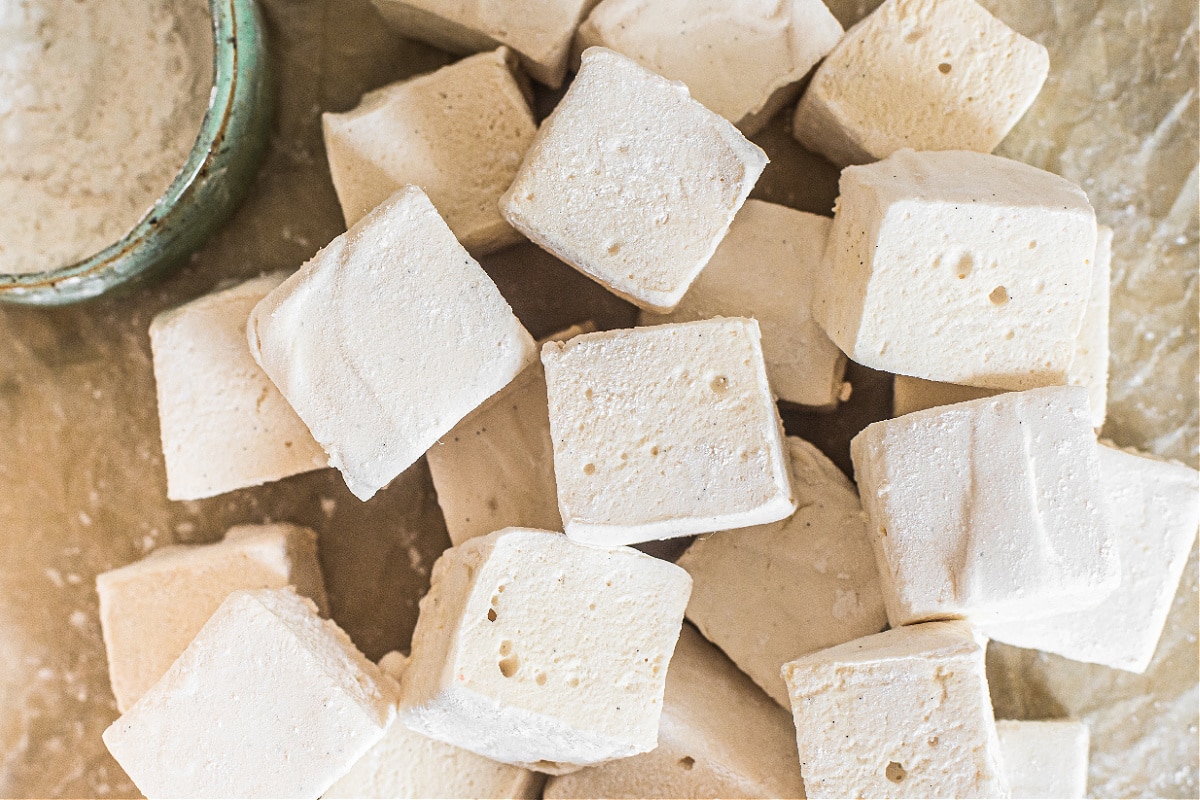
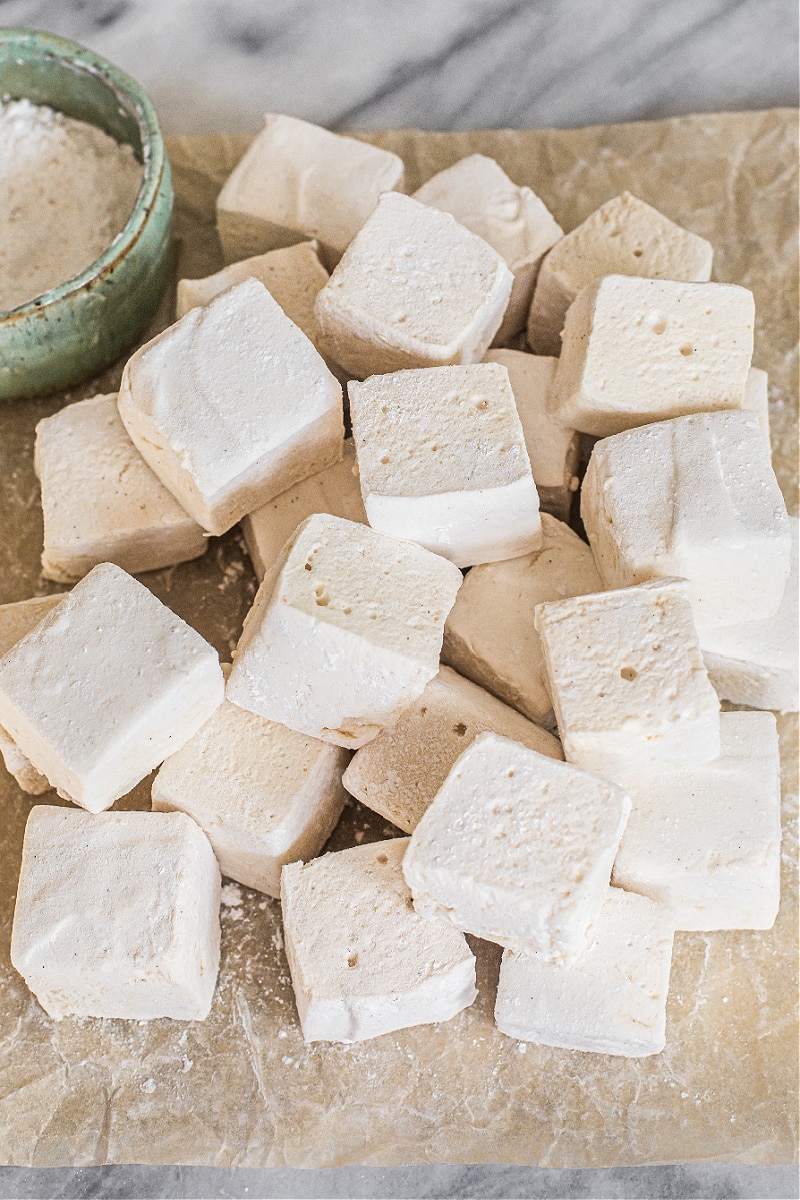
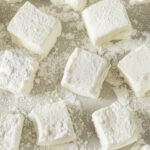
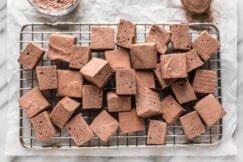
How Do I Neatly Cut Homemade Marshmallows?
To cut clean marshmallows, use a sharp knife dipped in hot water.
Wipe the knife between cuts and reheat as needed. You can also lightly oil your hands with some coconut oil to prevent sticking.
This makes a big difference and keeps the marshmallows looking neat.
How to Store Homemade Marshmallows
Store homemade marshmallows in an airtight container at room temperature.
They will keep well for about one week. Make sure they stay dry, as moisture can make them sticky.
How to Make Marshmallows Without Corn Syrup
This marshmallow recipe uses maple syrup instead of corn syrup.
The key is heating the syrup to 240ºF. This thickens the syrup so it acts like corn syrup in traditional recipes. I actually use this heated syrup in other recipes that ask for corn syrup. It’s a great hack!
Corn syrup is highly processed and very inflammatory, especially for the liver. Using maple syrup is a better option.
These marshmallows are not healthy food, but they are a healthier version of a classic treat!
Flavoring Options for Homemade Marshmallows
You can easily change the flavor of this marshmallow recipe.
You can add a 1/2 teaspoon of any of these flavorings:
Peppermint extract
Coconut extract
Hazelnut extract
Add the flavoring when you pour the hot syrup into the gelatin.
Marshmallows Recipe FAQ
Can I Make Marshmallows Without a Candy Thermometer?
It is possible, but not ideal. Hitting the right temperature is very important for texture, so I highly recommend it. This is the candy thermometer that I use.
Can I Make Colored Marshmallows?
Yes. You can add drops of non-toxic food coloring or use a teaspoon of finely ground strawberry powder for a natural pink color.
Do Marshmallows Go Bad?
Homemade marshmallows can dry out or get sticky over time. Stored properly, they last about one week.
Can I Make Marshmallows Without Gelatin?
Traditional marshmallows need gelatin. There are vegan versions using other ingredients, but this recipe requires gelatin.
What to Make With Marshmallows
Homemade s’mores – here’s my recipe for homemade gluten-free graham crackers
Mini marshmallows for hot chocolate
Mallomar cookies
S’mores bars
Homemade Marshmallows (with honey or maple syrup)
The marshmallows recipe can also be made with maple syrup. If you prefer, substitute the 2 cups honey for 2 cups pure maple syrup. As with all desserts, remember to enjoy in moderation.
- Prep Time: 20 minutes
- Cook Time: 10 minutes
- Total Time: 8 hours 30 minutes
- Yield: About 10-12 Marshmallows
- Category: Dessert
- Cuisine: American
- Diet: Gluten Free
Ingredients
For the Marshmallows:
- 3 tablespoons unflavored grass-fed gelatin
- 1/2 cup water
- 2 cups maple syrup, I prefer grade A for it's richer and fuller flavor
- 1 vanilla bean, split, with seeds scraped out (or 1/2 teaspoon vanilla extract)
- 1/4 teaspoon Celtic sea salt
Instructions
- Sprinkle gelatin over 1/2 cup water in the bowl of a standing mixer with a whisk attached. Set aside for 5 minutes so the gelatin can soften and bloom. Lightly oil a 13 x 9-inch baking dish.
- Whisk together maple syrup and salt in a medium saucepan over medium heat. Add vanilla bean and vanilla seeds. Gently simmer until honey reaches 240°F. With mixer on medium speed, very slowly add syrup to gelatin and water in mixing bowl (it should take about 1 1/2 minutes to add all of the honey mixture). Turn mixer on high for 10 minutes until liquid has doubled and becomes light and fluffy. Pour the marshmallow mixture into the oiled baking dish and let sit at room temperature overnight, uncovered.
- The next day, flip the marshmallows onto a greased cutting board. Cut marshmallows using a knife dipped in hot water, to prevent sticking (I also oiled my hands when handling the marshmallows to prevent sticking).


5 Comments