Last Updated on October 13, 2025 by Carrie Korem, FNTP
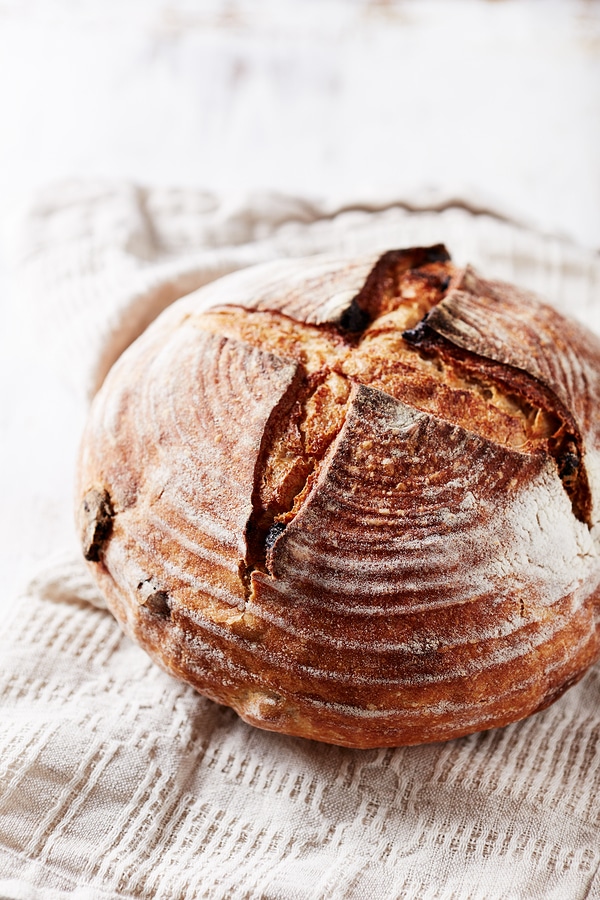
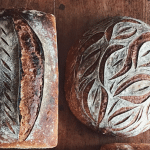
I’ve wanted to share a homemade sourdough bread recipe for a very long time, so I’m thrilled to write this post for you!
If you’ve been hesitant to try making sourdough because it sounds intimidating, I want to assure you — you can absolutely do this. Once you understand the rhythm of sourdough, it becomes second nature and so rewarding.
Sourdough Health Benefits
Sourdough bread is unlike any other bread because it’s made through a natural fermentation process. This process creates beneficial bacteria (lactobacilli) and wild yeast that help:
- Break down gluten and phytic acid
- Lower the glycemic index
- Improve mineral absorption
- Support healthy gut bacteria
Many people who struggle to digest conventional bread find they can enjoy naturally fermented sourdough without the same discomfort. It’s not gluten-free, but fermentation changes the structure of gluten and carbohydrates, making them easier for your body to handle.
And, sourdough bread contains healthy resistant starch and doesn’t raise blood glucose levels as much as conventional wheat bread.
What Is Fermented Sourdough Bread?
Fermented sourdough bread is made using a starter — a live culture of flour and water that ferments over several days. This living mixture replaces commercial yeast and gives sourdough its rise and signature tang.
Unlike traditional bread, sourdough rises slowly, which gives the natural yeasts time to feed on the flour and develop deep flavor. The slow fermentation also helps neutralize phytic acid, a compound that can block mineral absorption, and creates beneficial enzymes and organic acids.
The process of slow fermentation allows the bacteria to break down the carbohydrates and gluten and also neutralizes the phytic acid, making it easier for the body to digest.
Is Sourdough Bread Gluten-Free?
The short answer is “no”. If you allow the bread to ferment (aka – sit in the fridge for a day or two), then the gluten will be reduced by around 97%. But, there will still be gluten in the bread. This applies even if you use fresh milled flour.
What Are the Benefits of Sourdough Fermentation?
Here’s where the science gets fascinating! During fermentation:
-
- Phytic acid is broken down, allowing your body to absorb nutrients like magnesium, zinc, and iron more effectively.
- Gluten and starches are partially pre-digested by beneficial bacteria, reducing potential bloating or digestive upset. In fact, forty-eight hours of slow fermentation will destroy 97% of all the gluten in the bread!
- Lactic acid forms, which gives sourdough its tangy flavor and also helps preserve the bread naturally — no additives needed!
Fermented sourdough is more digestible and nutritious than regular bread. It’s also a great source of resistant starch, which supports gut health and helps keep blood sugar levels more steady.
To learn more about the science behind fermenting bread, check out this podcast.
Tips
- Always use filtered or spring water — chlorine can harm the starter.
- Weigh your ingredients in grams for accuracy.
- Use organic flour whenever possible for the best flavor and fermentation.
- Be patient! Good sourdough takes time, but it’s worth it.
To make a sourdough bread, you’ll need a sourdough starter. Here is an easy homemade recipe. You can also purchase the Culture’s for Health Sourdough Starter and follow the directions written on the box.
Ingredients
For the Levain
- 25g bubbly sourdough starter
- 70g purified or spring water
- 70g organic all-purpose flour
For the Dough
- 725g + 50g purified or spring water
- 150g levain
- 200g organic whole wheat flour
- 800g organic all-purpose flour (divided)
- 25g Celtic sea salt or Himalayan pink salt
For the Bake
- Organic white flour for dusting
- 60g rice flour for proofing baskets
Tools You May Need to Make This Sourdough bread:
16-ounce (or lager) mason jar
Digital scale that measures in grams and can zero out
Large glass or ceramic bowl
Dough whisk
Large wooden spoon
2 Brotform (proofing basket) you can use round or oblong
Dutch oven (at least 5 1/2 quart or larger) or Cast Iron Combo Cooker
Clean, lint-free towels
Oven mitts
Oven thermometer
Scoring tool or razor (optional)
2 large plastic bags (like the kind you can put a turkey in)
How To Make Beginner’s Sourdough Bread: Easy Step-By-Step Instructions
Step 1: Make the Levain
The night before baking, mix together your starter, water, and flour in a small bowl. Mark the level and let it rest overnight (10–12 hours) until doubled in volume.
Step 2: Build the Dough
Whisk 725g water with the levain until combined. Add flours and mix by hand until no dry clumps remain. Cover and let rest for 30 minutes.
Add salt and 50g of water, mix again, and rest 30 more minutes.
Stretch and Fold
Over the next 2 hours, perform 4 “stretch and folds” every 30 minutes. This strengthens the dough and helps create structure.
Cover the dough and let it rest for 1 hour after the final fold.
Shape
Turn the dough out onto a floured surface, divide in half, and shape into rounds. Place each into a floured brotform, cover, and refrigerate overnight for a slow, cold ferment.
The Bake
Preheat your oven to 500°F with a Dutch oven inside for one hour.
Carefully place your dough inside, score the top, and cover with the lid.
Bake for 20 minutes covered, then uncover and reduce temperature to 465°F for another 10–15 minutes.
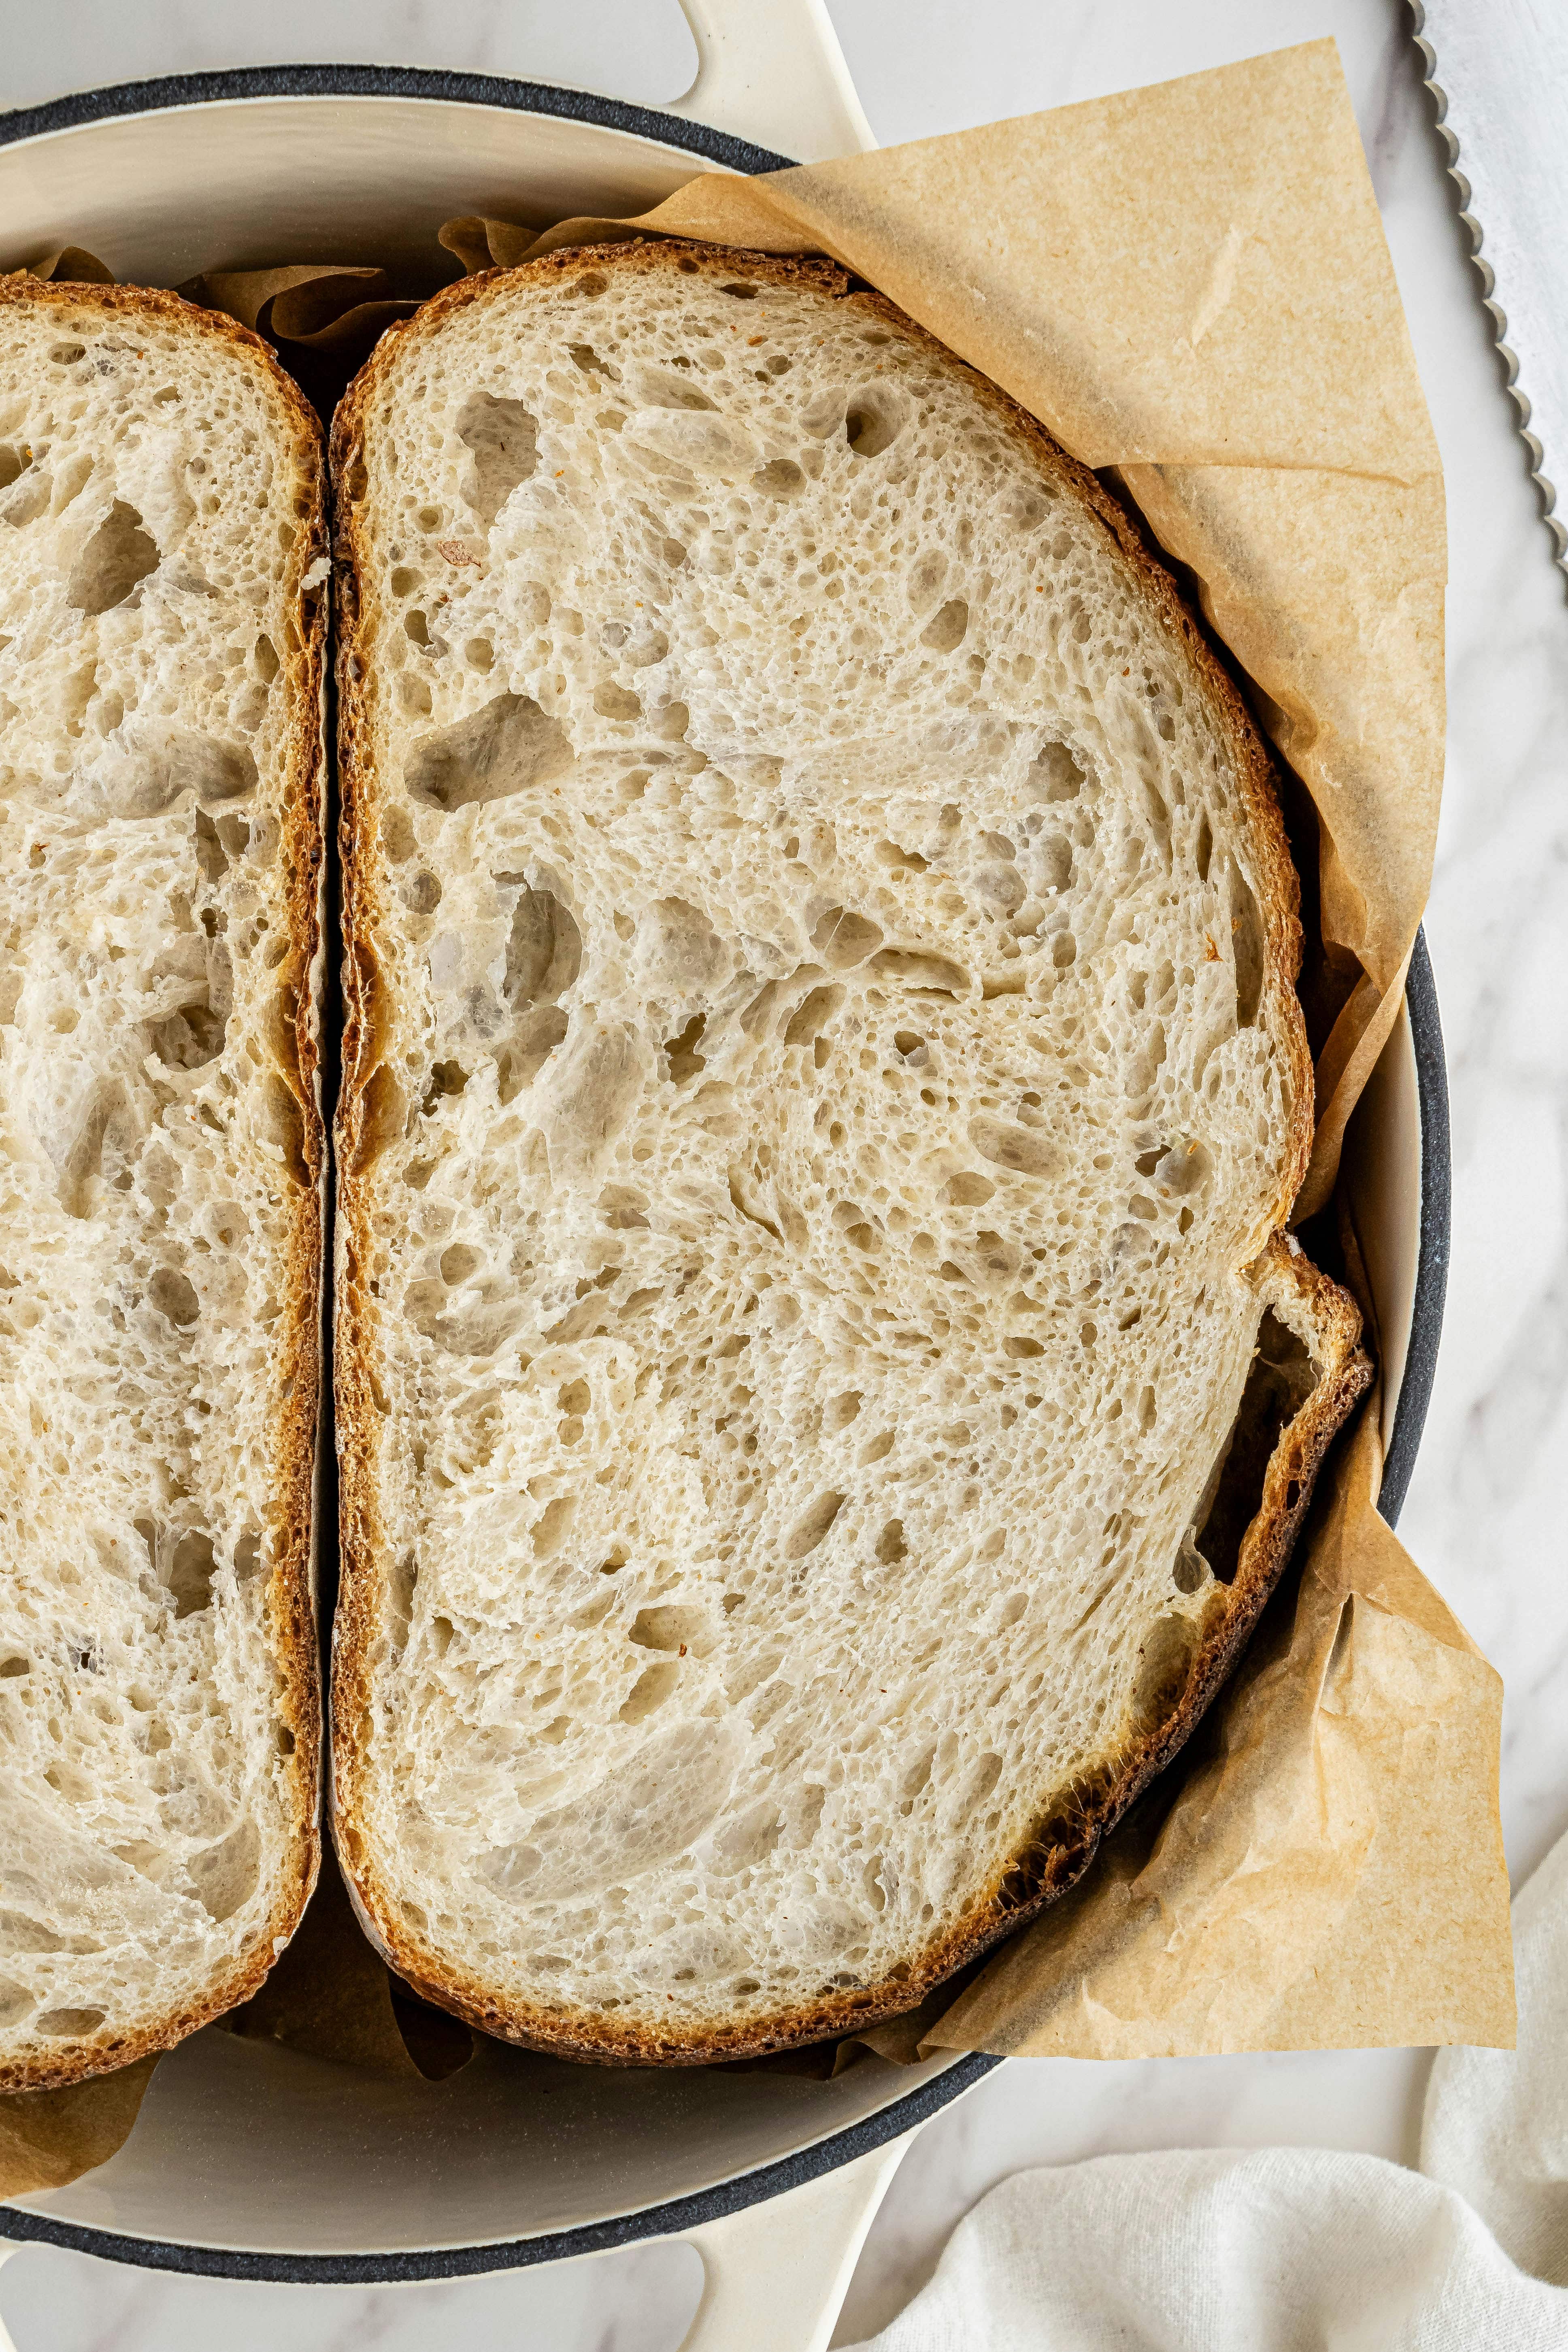
The bread is done when golden brown and the internal temp is 190–210°F.
Cool for at least 1 hour before slicing.
How to Feed a Sourdough Starter
Feed your starter with equal parts flour and water by weight once every 24 hours (or after each bake). Discard half before feeding if you aren’t baking daily to keep it manageable.
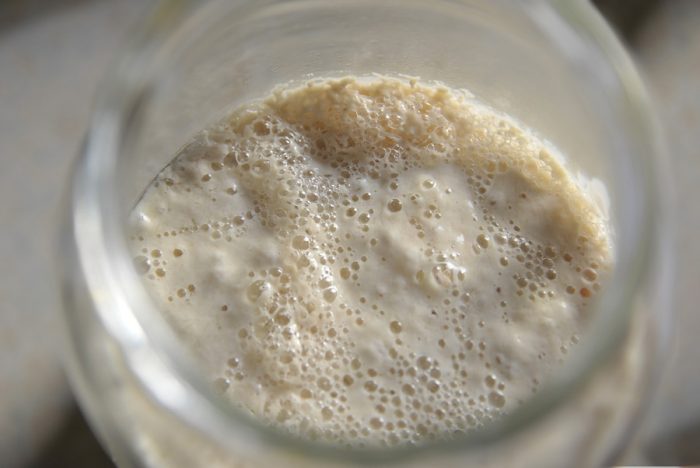
How Do I Know if My Starter Is Ready to Be Used?
Drop a spoonful in a glass of water — if it floats, it’s ready! If it sinks, give it a few more hours or another feeding.
What Equipment Do I Need?
A good kitchen scale, a large mixing bowl, and a Dutch oven are the essentials. Optional items like a brotform basket or scoring blade can help, but they’re not required for great bread.
What Is the Best Dutch Oven for Sourdough Bread?
Any heavy cast iron Dutch oven works beautifully. I love the Lodge Dutch Oven or Le Creuset Dutch Oven for their easy handling and excellent heat retention.
Here is a video I made over on Instagram that shows you step-by-step how to make this recipe.
Hungry for More Sourdough Recipes?
Once you’ve mastered this sourdough bread recipe, try these next:
- Sourdough Cinnamon Rolls
- Fermented Sourdough Chocolate Chip Cookies
- Overnight Sourdough Pancakes
- Sourdough Banana Zucchini Muffins
Each one uses the same fermentation principles and is a delicious way to enjoy all the benefits of sourdough baking.
PrintSourdough Bread Recipe
- Prep Time: 40 minutes
- Cook Time: 35 minutes
- Total Time: 51 hours
- Yield: Makes 2 loaves
- Category: Baking
Ingredients
For the Levain:
- 25 grams bubbly sourdough starter
- 70 grams purified/spring water
- 70 grams organic all-purpose flour
Build the Dough:
- 725 + 50 grams purified/spring water
- 150 grams levain (see above)
- 200 grams organic whole wheat flour
- 800 grams organic all-purpose flour, divided
- 25 grams Celtic sea salt or Himalayan pink salt
Stretching, Folding and Bulk Fermentation:
- Organic white flour for dusting
For the Bake:
- About 60 grams rice flour for dusting bowls
Instructions
For the Levain:
- The evening before you make bread, mix together 25 grams starter, 70 grams water and 70 grams flour in a 16oz mason jar or small bowl with straight sides. Mark the level with tape or a rubber band. Cover the mixture with a clean towel and leave on the counter at room temperature. The mixture will be ready in 10-12 hours and will double or even triple in volume.
- Note: During hot months, this can take 6-8 hours depending on the temperature of your kitchen. You can use ice water to slow this process in the summer. Using water that is 130ºF will speed this process into 4-5 hours, but for best flavor, I recommend allowing for a longer ferment time.
Build the Dough:
- Pour 725 grams of water into a large glass or ceramic mixing bowl. Drop a tablespoon of levain into the bowl and see if it floats. If it floats, add the rest of the levian to the water and whisk to combine. If it doesn’t float, wait another hour and try again. Add 200 grams of whole wheat flour and 300 grams of organic all-purpose flour to the water mixture and combine with a dough whisk. Add the remaining 500 grams of all-purpose flour and mix with your hands, making sure there are no dry clumps of flour.
- Note: The temperature of your water in relation to your ambient room temperature is very important. In the wintertime, it’s helpful to use warmer water and in the hottest months, ice water would be appropriate.
- Cover and autolyse (let sit) for 30 minutes.
- Add 25 grams Celtic sea salt or Himalayan salt and 50 grams of water and mix by hand until incorporated. Cover the dough with a clean cloth and let rest for 30 minutes.
Stretching, Folding and Bulk Fermentation:
- Stretch and fold the dough four times (watch the video above and start at the 1:02 minute mark). Place a clean cloth over the dough and let it sit for 30 minutes. Then, stretch and fold the dough again, place a clean cloth over the dough and let sit for another 30 minutes. Repeat two more times for a total of four times.
- During the second fold, herbs, olives, nuts, etc. can be added. Cover the dough with a clean cloth and allow it to rest for an hour.
- Lightly dust a wooden board or a clean counter top with flour. Turn the dough out onto the floured surface. The dough will be sticky, so it helps to have wet hands. Using a bench knife or a large chef’s knife, cut the dough in half and make two rounds of dough. Cover with a clean cloth and let sit for another hour.
- Dust two brotforms with flour. If you don’t have a brotform, you can use a basket lined with a dishtowel (if doing this, make sure the dust the dishtowel with flour). Don’t skimp on the flour or your loaves will become difficult to remove when it’s time to bake them.
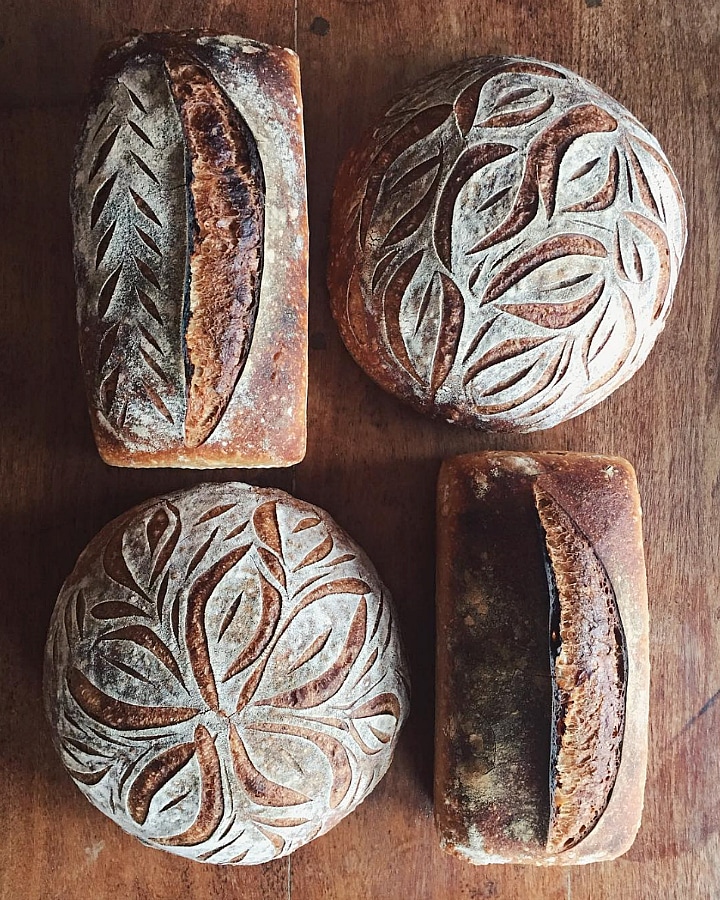
- Now it’s time to shape the dough into a boule. You will do a series of four folds: bottom to top, top to bottom, left to right and right to left, before flipping over and shaping into a round. Then, gather the ball and place it upside down in a brotform, seam side up. (Watch the video in the post above to see exactly how to do this).
For the Final Rise:
- Cover the dough loosely with a clean dish towel and allow to sit at room temp for another hour, then lightly tuck dish towel on top of the dough and place in refrigerator.
- After the dough has been in the fridge for 12 hours (or the next morning), place each of the bowls with dough in a large plastic bag (I use plastic bags that you can bake turkeys in) to keep the dough from drying out and absorbing flavors from your refrigerator. After placing the loaves in the large plastic bags the loaves will remain in the fridge for another 24 hours for a total of 36-40 hours.
For the Bake:
- Place a Dutch Oven with a lid in a cold oven. Preheat the oven to 500ºF with your pot inside for one hour. Pull a loaf out from the refrigerator. Lightly dust the top (which is actually the bottom) with rice flour. Flip the loaf out onto a small cutting board. You can now score the top with a razor or lame, if desired. Carefully remove the hot pot from the oven, slide the loaf into the pot, place the lid back onto the pot and place in the oven. Be very careful. The pot is very hot!
- Bake for 20 minutes. Carefully remove the lid (again, be careful because it’s very hot), reduce the temperature to 465ºF and bake for another 10-15 minutes until the bread is golden brown on top. You can also test for doneness with an instant read thermometer. If you put the thermometer in the middle of the loaf and it reads 190º-210ºF then it’s fully cooked.
- Remove the loaf of bread from the pot and allow the bread to cool for at least one hour. The bread will continue baking during this time.
- For your second loaf, you will return the pot to the hot oven and raise the temperature back up to 500º and let it heat up for 15 minutes before removing your second loaf from the refrigerator and repeating the process.
- Note: Because all ovens vary, you will definitely want to purchase an inexpensive oven thermometer and place it in the back to make sure that your oven temperature is consistent and accurate.
Nutrition
- Serving Size: 1


115 Comments