Last Updated on March 5, 2026 by Deliciously Organic Editor
Braised Chicken is a comforting dish to make during the winter months. Other dishes I love to prepare in the winter are Lentil Soup with Swiss Chard and Sausage, Butter Chicken (always a hit!), and White Beans and Sausage in the Crock Pot.
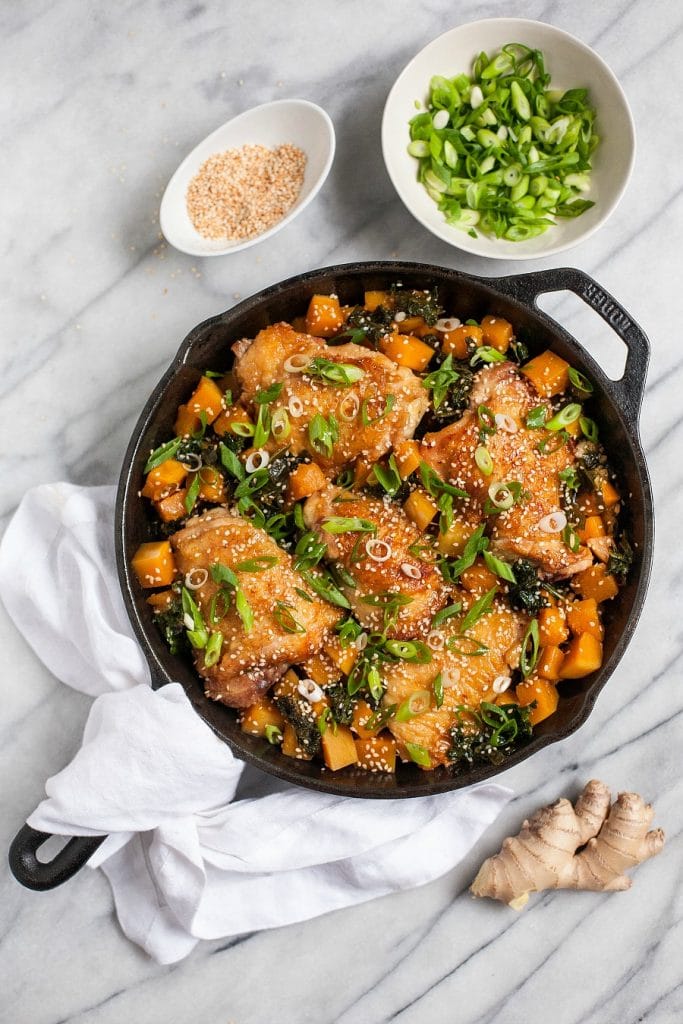
While I love using white meat, a braised dish usually works much better with dark meat. In this recipe, I braise chicken thighs with broth, ginger, chiles, scallions, and tamari to create deep, rich flavors. The leftovers are fabulous!
I added some butternut squash and kale to the recipe, but you can switch those out with other squashes or leafy greens if you prefer.
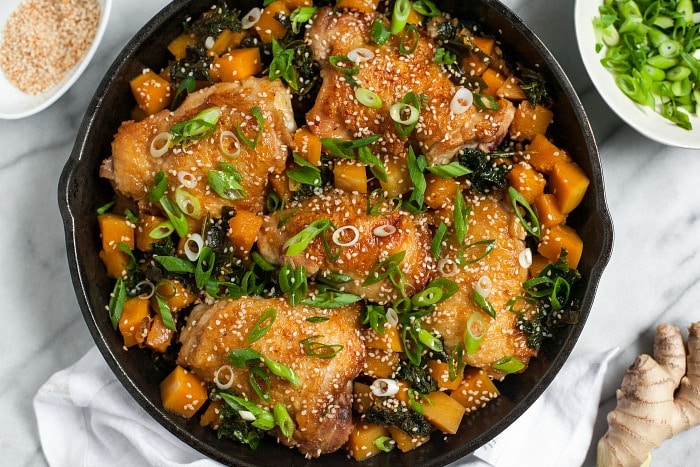
I like to serve this dish with mashed or Duchess potatoes and a green salad. Enjoy!
PrintBraised Chicken Thighs with Squash and Kale (Gluten-Free)

Adapted from Bon Appetit.
- Prep Time: 21 minutes
- Cook Time: 35 minutes
- Total Time: 56 minutes
- Yield: Serves 6
- Category: Main Dish
- Method: Sautéing
- Cuisine: American
- Diet: Gluten-Free
Ingredients
- 4 pounds skin-on, bone-in chicken thighs (about 12), patted dry
- Celtic sea salt
- Freshly ground pepper
- 2 tablespoons ghee
- 1 bunch scallions, sliced into 1-inch pieces
- 1 dried chiles de árbol
- 2 tablespoons chopped ginger
- 3 cups chicken broth, divided
- 1/2 cup fermented gluten-free tamari or coconut aminos
- 2 tablespoons coconut sugar (or raw honey for GAPS)
- 2 tablespoons sesame oil
- 1 butternut squash, cut into bite-size pieces
- 1 bunch kale, chopped and steamed (this is why I prefer to cook the greens first, but if you’d like to add them raw, that will work as well)
- 1 tablespoon coconut vinegar
- 2 teaspoons toasted sesame seeds
Instructions
- Lightly season the chicken thighs with sea salt and pepper. Heat the ghee in a large Dutch oven or other heavy pot over medium-high. Working in 2 batches, cook chicken, skin side down, until skin is browned and crisp, about 8–10 minutes. Transfer the chicken to a plate, placing skin side up (the chicken will not be cooked through at this point).
- Keep the heat at medium-high (keep any leftover ghee, chicken fat, etc. in the pot) and place the scallions, chiles, and ginger in the pot to cook, stirring frequently until onions are just turning golden brown on the edges, about 3 minutes.
- Add 1 cup of chicken broth, bring to a simmer, and cook until reduced to about 3 tablespoons. This will take about 5 minutes. Add the tamari, coconut sugar, sesame oil, and remaining broth and bring to a simmer, stirring to dissolve sugar. Place the butternut squash and kale in the pot. Place the chicken, skin-side up on top of the squash and kale, and, using a pair of tongs, nestle each piece of chicken down into the liquid mixture so the bottom of each piece of chicken is in the liquid. Partially cover the pot, reduce the heat to medium-low, and simmer until the chicken and squash are cooked through, about 20 minutes.
- Remove the chicken, increase the heat to medium, and continue to cook until liquid is reduced by about two-thirds and has the consistency of thin gravy, about 10–15 minutes.
- Remove the pot from heat and drizzle the vinegar over the squash and kale mixture. Add the chicken back to pot, turning to coat in sauce, and sprinkle sesame seeds over top.
- This recipe can be made 2 days ahead. Let cool; cover and chill and then reheat covered over low heat.
Photo Credit: Becky Winkler



Decided to dive right into this recipe since I had all the ingredients and was cooking with items i’d never used before (butternut squash). The recipe went really well up until the part I’m supposed to add kale and butternut squash to the pot.. there was NO SPACE for 4 lbs of chicken thighs to “nestle down into the liquid.” the pot was quite literally full to the brim. I pulled squash and kale back out of the pot and tucked the thighs down into the bottom and added kale and squash back on top. It was a good 3″ of kale/squash on top. After 20 mins of cooking, the kale and squash are still overtaking the pot.. right at the end of our cooking endeavors I read the “Can be made 2 days ahead, cool down and then re heat at a low temp” note at the very bottom.. all the while my hungry family is grumpily waiting at the table…. started out as a fun recipe, ended up being a pain in the butt. Haven’t even tasted it yet because it’s still not finished.
EDIT::: Recipe turned out delicious.. just read the whole recipe before you start!!!
Made this for the first time last night. We LOVED it! It has a really nice Asian flair to it and will definitely be making this again.
So glad you enjoyed it! 🙂
I’m having trouble finding dried chiles de árbol. Can you please suggest a substitution?
I don’t test my recipes with substitutions, so I’m not sure what would work best.